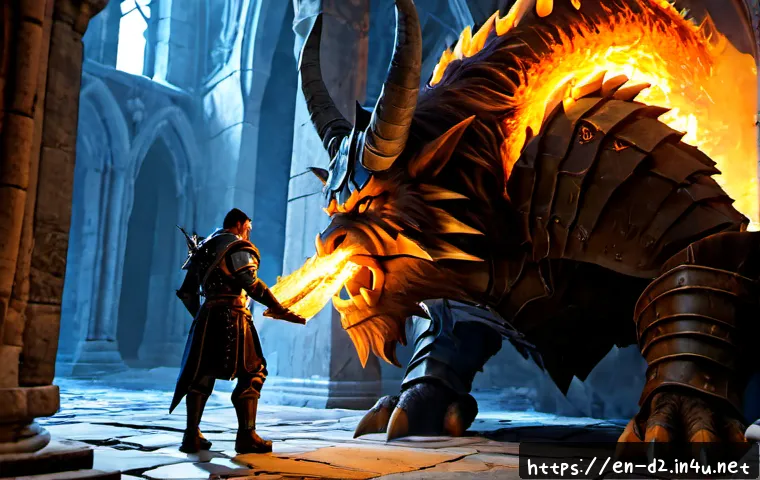
The safest way to handle Diablo II enemy packs is to identify their range, speed, support abilities, and damage pressure before committing to a fight.

Retreat or reposition when a pack combines fast pressure, ranged attacks, area damage, or a dangerous unique modifier in a tight space. Better positioning often fixes a problem before a gear upgrade is needed, while repeated deaths from the same damage type may point to a resistance or mitigation gap.
This matters more as difficulty rises and survival depends less on simply dealing damage first. Build guides, gear comparisons, and planning tools can help, but they are most useful when you already know what threat you are trying to solve.
A short threat check before each engagement makes farming runs smoother and less risky.
At a Glance
- Pause before engaging: check for ranged enemies, fast melee pressure, support monsters, and unusual elite behavior.
- Use the right response: reposition against projectiles, create space against fast packs, and remove revivers or supporters early.
- Change gear only with a clear reason: repeated resistance, recovery, or survivability problems may justify an upgrade.
| Threat Type | Warning Signs | Low-Cost Tactical Response | Gear-Dependent Response |
|---|---|---|---|
| Fast melee pressure | Enemies reach your character before the pack is separated | Back up, use open space, isolate the front line | Review defense, mitigation, recovery, and survivability options |
| Ranged projectile pressure | Attacks arrive from off-screen or multiple directions | Use corners, doorways, and line-of-sight breaks | Check resistances and defensive gear choices for the area |
| Elemental or poison pressure | Health drops quickly during a specific encounter type | Disengage, identify the source, and avoid stacking threats | Compare resistance and damage-mitigation upgrades |
| Support or revival enemies | Nearby monsters recover, return, or remain difficult to clear | Change target priority and remove support units first | Consider build planning changes if your damage cannot control the group |
Read the Battlefield First: The Fastest Way to Avoid Dangerous Enemy Combos
The first decision is not whether you can kill the pack. It is whether you can safely control the first few seconds of the encounter. A regular group can become dangerous when it includes champions, uniques, minions, ranged attackers, or support enemies at the same time.
The three signals to check before engaging a pack
First, check range: are attacks coming toward you before you reach the group? Second, check speed: can melee enemies surround or chase you quickly? Third, check support pressure: is something reviving, helping, or extending the fight? These signals matter more than the visible size of a pack.
Why range, speed, and support enemies change priority
Ranged enemies can punish a direct approach. Fast melee groups can punish standing still. Support enemies can make a normal clear take longer and create more opportunities for mistakes. If a unique monster has modifiers that affect movement, damage, defenses, or crowd-control pressure, treat the pack as an elite encounter rather than routine farming.
A quick retreat rule for risky rooms and narrow corridors
When you cannot see the whole room, do not force a full commitment. Step back if multiple threats can attack at once, especially when a narrow corridor prevents movement. A short retreat can pull part of the pack into a safer position. If backing up does not create space, consider a different route instead of turning an uncertain room into a recovery problem.
Compare Enemy Threat Types and the Best Defensive Responses
Different threats require different defenses. More damage is useful, but it does not solve every dangerous encounter. Positioning, resistances, crowd control, and target priority each answer a different kind of pressure.
Fast melee pressure versus ranged projectile pressure
Against fast melee packs, avoid being surrounded. Move into open ground when possible, let the front enemies arrive first, and avoid charging through unexplored space. Against ranged enemies, use walls, corners, doorframes, and changes in direction to reduce exposure. Chasing a ranged group into another unopened area can turn one threat into two.
Elemental attacks, poison pressure, and resistance checks
Diablo II enemies may deal physical, elemental, poison, magic, and other types of damage depending on the monster and encounter. If the same kind of encounter repeatedly causes sudden danger, review what damage is likely reaching you and whether your current resistance management fits that farming location. Higher difficulties generally make resistance management and damage mitigation more important.
Revivers, healers, and support enemies to eliminate early
Some enemy groups can support or revive nearby monsters. In these encounters, raw damage on the nearest target may be inefficient. Look for the enemy that keeps the group active, then change your priority if it can be reached safely. If reaching that target requires running through ranged fire or an elite pack, reposition first.
Threat table: tactical response versus gear-dependent response
A tactical response is usually enough when the death came from entering too quickly, fighting in a bad corridor, or ignoring a support monster. A gear-dependent response becomes more reasonable when the same area repeatedly exposes a clear weakness despite careful positioning. The goal is not to buy every upgrade; it is to match an upgrade to a known problem.
Build a Reliable Response Routine for Every Encounter
A repeatable routine reduces rushed decisions. Use the same order during regular farming runs so dangerous combinations stand out before they become lethal.
Scout, isolate, engage, reposition, and recover
Scout the edge of a room instead of entering the center. Isolate the first enemies you can safely pull. Engage only after you know whether the pack includes range, speed, or support pressure. Reposition when the fight expands beyond your safe space, then recover before moving into the next unknown area.
Use terrain, doorways, corners, and open space effectively
Terrain is a defensive tool. Doorways and corners can limit incoming angles from ranged enemies. Open space can prevent fast melee enemies from trapping a character. Neither option is always correct: a doorway can become unsafe if too many threats stack behind it, while open ground may expose you to more projectiles.
When crowd control is more valuable than more damage
Crowd control is valuable when it gives you time to separate threats, escape pressure, or remove a support enemy. If your damage is adequate against ordinary enemies but elite packs create chaos, a build adjustment that improves control or safety may provide more value than a small offensive increase.
Common Mistakes That Turn Routine Runs Into Deaths
Most avoidable deaths begin with one bad commitment. The mistake is often not the first hit taken, but the decision to keep moving forward after the threat pattern changed.
Chasing ranged enemies into unexplored areas
Ranged enemies encourage pursuit, but unexplored space may contain another group, an elite pack, or a different damage type. Pull back when possible. If they will not follow safely, decide whether the route is worth continuing rather than forcing the encounter.
Ignoring immunity or resistance mismatches

Exact immunities and mechanics can vary by version, difficulty, area, and random spawn. If your main damage approach is ineffective or an encounter takes too long, treat that as a planning signal. You may need a different target choice, a safer route, a backup option, or a build review.
Treating every elite pack like a standard monster group
Unique monsters may have modifiers that change how they move, deal damage, defend themselves, or pressure your character. Do not use the same opening that works on regular enemies without checking the pack first. A brief delay is usually cheaper than recovering from an avoidable death.
Overinvesting in damage while neglecting recovery tools
Damage helps shorten fights, but recovery and defensive options help when the fight does not go as planned. If a character clears quickly but repeatedly fails during surprise pressure, review the balance between offense, resistance management, mitigation, and recovery before assuming the solution is more damage.
Adjust the Strategy for Your Build and Game Mode
Your safest response depends on how your build engages. A melee character, a ranged caster, a solo farmer, and a Hardcore player do not take the same risks even in the same area.
Safer habits for melee characters
Melee builds should avoid entering the middle of an unknown pack. Pull enemies toward open space, avoid getting boxed into walls, and watch for ranged attackers behind the front line. If a group contains support enemies, do not break formation just to reach them; create a safer opening first.
Positioning priorities for casters and ranged builds
Ranged builds benefit from distance, but distance is not safety when attacks arrive from multiple directions. Keep an exit path, avoid casting from dead ends, and use line-of-sight breaks when projectile pressure increases. Reposition before enemies close the gap rather than after they have already surrounded you.
Solo farming versus multiplayer party coordination
Solo players must manage scouting, target priority, and survival alone. In a party, communicate which enemy is creating the biggest problem and avoid splitting the group into separate unexplored areas. A party can have more damage available, but mixed positioning can still create unsafe pulls.
Extra caution rules for Hardcore characters
Hardcore play rewards conservative routing. Treat uncertain elite combinations, narrow rooms, and unexplored ranged pressure as reasons to slow down. A route that is efficient in one game session may need adjustment in the next because area layouts and monster combinations can vary.
Selection Criteria and Comparison Summary
Use these checks before choosing between tactical practice, a gear upgrade, a respec option, a build guide, or a performance-planning tool:
- Positioning: Did the death begin after entering an unknown room or chasing enemies?
- Target priority: Did a reviver, supporter, ranged attacker, or elite monster remain active too long?
- Defense gap: Does the same damage pressure repeatedly overwhelm you despite safer play?
- Build fit: Does your main damage approach struggle with the area or encounter type?
- Version relevance: Does the guide or planning tool clearly support your game version, difficulty, and intended build?
- Budget relevance: Does the suggested item or upgrade solve your specific weakness rather than simply adding general power?
When comparing build guides, item upgrades, or planning tools, check the relevant page for version support, included details, and whether the recommendations match your farming goal.
In Closing
Reading enemy behavior is one of the most reliable ways to make Diablo II runs safer without immediately changing your entire build. Start with range, speed, support abilities, and available space. Then decide whether the answer is a retreat, a new target priority, a resistance review, or a gear adjustment. The best defensive choice is the one that solves the actual threat in front of you.
Useful Things to Know
Area conditions can change between sessions. A route that felt safe before may produce a different monster combination later. Treat each new room as a fresh decision, especially when farming on higher difficulties or playing Hardcore.
Important Notes
Enemy abilities, immunities, modifiers, and encounter behavior can vary by game version, difficulty, area, and random spawn. Original Diablo II, Lord of Destruction, Diablo II: Resurrected, and modded versions may not behave identically. No single resistance level, defensive setup, or damage target is universally safe for every class, build, or farming location.
Frequently Asked Questions
Q1. How can I tell whether an enemy pack is dangerous before I engage it?
A1. Check whether the group has ranged attacks, fast melee pressure, support or revival abilities, and an elite monster with unusual behavior. Also consider the room: limited movement and unexplored space can make an ordinary pack more dangerous.
Q2. Should I upgrade gear first or change my strategy when I keep dying in the same area?
A2. Change strategy first if deaths follow poor positioning, unsafe pulls, or missed target priority. Consider gear upgrades when careful play still reveals a repeated resistance, mitigation, recovery, or survivability gap tied to the same type of encounter.
Q3. Are paid Diablo II build guides or planning tools useful for new and returning players?
A3. They can be useful when they clearly explain version support, build goals, defensive choices, and budget relevance. Their value depends on whether they help solve a specific decision, such as safer farming routes, resistance planning, or an upgrade path, rather than offering generic advice.